Follow us on Social media

Home remedy for removing varicose veins permanently

Most think that only surgery can help with the treatment of varicose veins. How many would agree that apple cider vinegar can not only help deal with it? But can also treat varicose veins?

Consider fat loss instead of weight loss and see effective results

Consider fat loss instead of weight loss and see effective results

How to learn being more grateful and why you should do it.

It is said that being grateful has tremendous health benefits. Are you grateful? Do you know why it is good to be grateful? It is a sure fact that in life we both find a lack and an abundance.

Home remedy that promotes hair growth

If you are one of the people that worry about the health of your hair. This article is just for you. As I am sharing a natural safe home remedy that has so many nutrients for your hair. All you need is two ingredients. You probably have it already in your kitchen.

https://blogger.googleusercontent.com/img/b/R29vZ2xl/AVvXsEh2c4LUvAQz8UAuG51GchSA8sTUJdMogSkZwewHJdgCCpyybNsEuR-DSxR580ojjXmUy8aCtdy7MVcXN8xqceTWA32AHIRKdhnTgUxJQHhsHW50lZqAYlpAT8CLqJJ6FV-qX53rbew7pL0x/s320/Feb-healthy-heart-1.jpg

Heart health changes that should be implemented daily

Your heart. I am not thinking of your feelings or your love for someone. But about heart health. It does affect everyone especially if we don't choose a healthy lifestyle.

Tuesday, 28 November 2017

Rushing to go urinate middle of the night. Follow this rule first. It may save your life.

This advice I am about to share comes from a doctor. It can save your life, my life or the loves of other people just by sharing this article. It can affect any of us at any given time. So please take note and please save lives by sharing it. 


This article is for you especially if you are one of the many who wake up during the night or early morning for the need to urinate. It is safest to remember the half minute rule x3. You will see what I mean in a moment.   

Imagine for a moment you wake up suddenly and realize you need to rush to the bathroom. In all aspects you can be considered healthy and you take care of your health. But in these few moments of rushing to go to the bathroom to urinate you endanger your health. Worse you may not even realize how dangerous it can be. Even much more serious your life is at risk. Yes that is how serious this can be.   

If you wake up suddenly to go to the bathroom and you just stand up. It is very bad for you. Because the brain does not have enough blood at the specific moment. It can cause heart failure because there is a lack of blood. Or the brain may become anaemic. Causing heart failure and the end result is death.

So what should you do that is safest for you? 


  • Lie in bed for half a minute
  • Next sit in bed for another half minute
  • And last start to lower your legs. Sit on the edge of your bed for the other half minute.
  • Each one counts as thirty seconds to help your body to help with blood flow.


By doing this you will reduce the chance of falling while at the same time your heart wont fail or have anaemic brain will not occur . Thus avoiding suddenly dying. 

I hope this advice given helps to save lives. It is in all not even two minutes but life is precious. As seen it is 3 things, each lasting 30 seconds and it can save a life. So please share so it can save the lives of people. You may never know you saved someone's life. That person may not even know it by following the rules given. Life is precious. Treat it is such. By working together we can create a caring environment for everyone. I did my part. Will you?

If you have any questions, comments or suggestions feel free to comment below or contact us. 

Saturday, 21 October 2017

Waxing the good the bad and the home made recipes

Today I want to talk about something that many feel they will never consider. It is frowned upon by many. Yet those who do this as part of their beauty routine will praise the effectiveness of it. Painful? Yes. Effective mostly.  Facial hair, arms legs back and hair on many other parts can be removed by using this method But many will feel they will stick to their preferred ways of dealing with unwanted hair..  It is an opinion from the one person the next. But it is best only in the hands of someone who knows what they are doing. I am talking about waxing. Many are not sensitive to waxing. But for those who are sensitive to waxing. It is best to use other ways to get rid of unwanted hair


Waxing is an effective way to deal with unwanted hair growth. For 6 to 8 weeks there is no issue about hair growth. Hair growth will be thinner. So many consider it as an ideal way to deal with unwanted hair growth. First the home made waxing recipes. There is a variety of ways available. It is about personal preference. 

Please read the full article before you want to do it you do not have experience about waxing.

Sugar wax

  • 2 cups sugar
  • 1/4 cup lemon juice
  • 1/4 cup water
  • 1 or 2 drops tea tree essential oil (optional)  


Place everything together in a saucepan. Put the pan with the mixture on the stove. Medium high heat is best temperature for melting the ingredients. Keep stirring the mixture. Please know that sugar can burn fast. The intention is to melt the sugar. You are looking for a consistency that is syrup in appearance. It should be golden brown in appearance. Remove the mixture from the stove. Pour into container that can handle high heat. Leave the mixture to cool for two hours before you want to use it. 

Honey wax

  • 1 cup white sugar, granulated
  • 1/4 cup honey
  • Juice of half a lemon 


Put all the ingredients in saucepan. Stir everything. Again remember that sugar burns easily so stir frequently.  Keep doing that till everything has melted. There should not be any sign of sugar granules. Remove the mixture from the stove and leave it to cool to room temperature. 

Waxing method

Use cotton fabric cut into strips after applying a thin layer of wax over freshly washed skin. Rub with your fingers to make sure everything spreads evenly. Always apply wax in the direction of hair growth. Never the opposite. Leave it to harden on skin. Now take the side of the strip and quickly remove the strip from your skin. Pull the opposite direction of hair growth.  

Word of caution

In the hands of a novice it is very very dangerous. So get information about safely waxing or ask a friend that knows enough already to help. Make it a girls hangout. If the wax mixture drips easily. Do not attempt to use it. The only thing you will experience is painful burns on your skin. And it can be very serious. Depending on how hot the mixture is. So if you are a first time user. Please first and most. Be careful. Do not burn yourself. Not only is it painful. It is also very dangerous if the burns are severe. Find a friend that has experience. Or find information to avoid burning yourself.

How to deal with waxing burns.

If it is minor burns. This will be effective. By minor burns I mean some redness and swelling that may occur. For more severe burns find medical help.
First apply an ice pack. Do not directly apply ice cubes onto skin. Wrap ice cubes in cloth or towel. Something that will avoid freezer burns. And leave it on for a few minutes. Apply Vaseline over the area as it protects skin from becoming infected. This is only effective it is some minor burns. If you find that you have severe burns you should seek medical attention. Do remember that skin that has burns are prone to infections. You will deal with redness and swelling for a few days but your skin will heal. 

With that said I hope that this article not only helps those who are considering waxing but it also saves those who do know how dangerous waxing can be if you do not know what you are doing. Please use this methods safely. Or keep using your preferred methods of dealing with unwanted hair.  

Please share so others can benefit from the advice given. Feel free to comment below or contact us if you have advice suggestions or comments

Wednesday, 11 October 2017

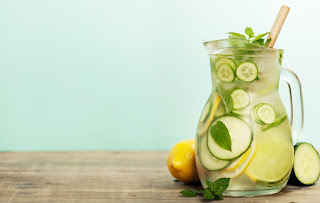
Detox drink that works for belly fat and weight loss

Want to lose unwanted weight. But also that dreaded belly fat? How many of us would love to just easily get rid of that unwanted weight or belly fat. Just to wish it gone. But it isnt that easy. No matter how long we stare at it. So the options are obvious. Take action or accept the changes you so wish to change. I chose taking action. And because of that. I am sharing the successful weight loss drink recipe with you. Try it and you will be amazed at the results. 
It is safe easy and it really works. Yes this actually works and an added bonus. It is a great detox drink. You will also get a flat tummy just by drinking this.  It becomes a delicious drink you can enjoy.


Ingredients.
Water about 500 ml for each container or bottle
Lemon slices 3 to 4 slices
Cucumber slices 4 to 5 slices
Ginger slices 4 to 5 slices
Mint leaves. just a few. about ten
Apple cider vinegar with mother enzyme (raw) 2 teaspoons
Personally I like to add a teaspoon lemon juice also. But that is personal preference

Method
Put all ingredients with water in the bottle or pitcher. 
Leave for at least 6 six hours
Drink this every morning on an empty stomach. 
And at night just before going to bed 

I prefer 1 liter bottles. I also prefer this as my detox drink during the day. But I have to admit I found myself craving sugar or anything sweet for the first few days. And because of that I added half a teaspoon of cinnamon powder.

It is all about personal preference. The amount is a safe guideline. 
It is a natural infused drink that tastes delicious and has wonderful benefits. So consider this drink the next time you decide to lose weight. Personally I appreciate the coolness of the mint and the refreshing taste of the cucumber. What is your opinion? I would love to know what people think about this delicious detox drink that helps you lose weight and get rid of that stubborn belly fat.

If you have any questions or suggestions or comments. Feel free to comment below or contact us. Please share so others can benefit from it too.

Wednesday, 13 September 2017

Eye pack home remedy that is effective to remove dark circles under eyes


If you look in the mirror and you see dark under eye circles. It may be that you know that it is because you had a late night or it is hereditary. But it remains a fact that it does not look healthy and at the same time can make you look older too.
But one thing remains for sure. There is natural ways to get rid it. Effective and quick  ways. I am sharing an eye pack that you can make and you will see it helps to get rid of under eye circles.


Need another dark circle removal home remedy? Read about it here. This one is another favorite to get rid of dark circles just as easily and you only need two ingredients.

Dark circles eye pack

Items needed

Fresh coconut (ground)
Lemon juice, just a few drops
Cucumber 2 teaspoon (grated)
Fresh cream 1 teaspoon
China clay 3 teaspoons
Cotton gauge to place over eyelids
Milk and water to rinse face afterwards

Please be careful that the mixture does not drip into eyes!!

Method

Mix everything together and leave it in the fridge for a while.  Cover your eyes with the gauge and now put the mask over your eye. Best to relax in a cooler area while you leave the eye pack to do it's magic.  Leave for 20 minutes or longer if you wish. Wash your face and eye area gently with milk first and afterwards with water

The natural treatment for dark circles is one of many ways that works to get rid of under eye dark circles. Another way to remove dark circles can be read about here. It is just as effective. It is all about personal preference. Read about here

I hope this article helps you of you have dark circles. If you have any suggestions comments or questions feel free to contact us or comment below. Or if you know what will work. Feel free to share it so everyone can benefit from your comment. 

If you feel you would prefer to see what you would prefer what would work for dark circles. You can see the full menu for dark circles here. It covers all home remedies as well as lifestyle changes to consider. 

Please share so others can benefit from the home remedy also

Tuesday, 29 August 2017

Feeding face masking for sunburnt skin

You know when it is summer and you end up with a face that shows that you were in the sun for too long. Your face, neck nose cheeks or even forehead usually can be tell tale signs of such painful occurrences. Now here is face mask that is especially idea for that time. It helps to soothe sun burnt skin as well as repair it. While at the same time giving much needed nutrients too.

If you want a face mask that is made with only two ingredients. 
You can check it here
This mask is ideal for radiant skin. 

Also effective in helping to lighten dark spots naturally.


Feeding face masking for sunburnt skin

5 ml Bulgarian yogurt
5 ml Honey
5ml Lemon juice
1 Avocado ( ripe)

5 ml equals one teaspoon

Mix everything together. Put in the fridge and leave it for 30 minutes before you want to apply this facial mask on your freshly cleansed face. There is no specific guideline as to how long it should be left on your face. You can decide. But please that does not mean leave it on overnight!  


Another great mask that you can read about.
This one is great for wrinkle free skin. 


This face mask is good for sun damaged skin as well as being very nutritional. But the best part of this mask is the fact that it is meant too help for sun burnt skin. Yogurt is one of the most effective ways to help repair skin that has been exposed to sunlight for too long. Honey is a very known ingredients on this site. Because of it's wonderful attributes. And lemon juice is good for many reasons. One of them being a natural way to lighten skin. Avocado is great as it nourishes and nurtures skin. But by combining the ingredients. You have a face mask that is soothing after being exposed to the sun for too long.


Want to know how honey can improve your lifestyle or health? Feel free to read about it here.
No doubt you will wonder why you never thought about it. Till now


If you have any question comments or even suggestions. 

Feel free to comment below or contact us.
Please share so others can benefit from this article too

Monday, 21 August 2017

Herbal pillow for sleeplessness using dry ingredients home remedy

If you struggle to sleep at night but don't know what to do. Then you can consider this herbal pillow. Unlike many medications that you may buy it has no negative side effects. This is also a recipe from my personal collection. Try it the next time you can not sleep and see for yourself why it is a favorite for me.

Ingredients
2 heaped teaspoons lemon balm
2 heaped teaspoons rose petals
2 heaped teaspoons lavender
2 heaped teaspoons camomile
1 heaped teaspoon dill seeds

Method
Mix everything and put in a small bag. When you can not sleep. Just use this. Place it next to your pillow or under your pillow case. You will find yourself drifting to sleep easily. With these soothing scents.

For babies it is different though.
2 handfuls camomile
1 teaspoon dill seeds

I hope you like this recipe and will use it the next time you can not sleep. It is safe and an approved home remedy against sleeplessness

If you want other effective ways to treat insomnia then please read

If you have any comments suggestions or questions. 
Feel free to comment below or contact us.
Please share so others can benefit from it too

Witch hazel and rosewater facial toner

If you want a DIY toner for your face then you can consider this.
It is best used for normal skin as it gives a tight feeling to your skin. While at the same time helping to restore as well as balance ph levels. 


Ingredients
4 tablespoons lemon juice
4 tablespoons with hazel
4 tablespoons rosewater
3 drops lavender essential oil

Method
Pour all ingredients into a clean bottle
Shake well  before using the toner
Apply with cotton ball after you cleansed your face


Try this and see for yourself.
This facial toner is really refreshing.


I hope you liked this.
If you have any questions comments or suggestions feel free to contact us or comment below
Please share so others can read about this article too


Saturday, 19 August 2017

Refreshing footbath

Today I am sharing another favorite from my personal collection. This time the focus is on tired feet. So with that in mind I am sharing a recipe that is excellent as a refreshing footbath. Best thing about this. You only need 4 ingredients. And it works. How great is that. Relaxing and taking a time out. But at the same time giving your feet a refreshed feeling. 


Ingredients

Handful mint leaves
5 twigs rosemary
200ml milk
10 drops peppermint oil

Method

Heat the milk and add the rosemary and peppermint leaves. Take the milk mixture of the heat just before it reaches boiling point. peppermint oil. Take a wash cloth and place it in this mixture. Wrap the washcloth with the mixture around feet. Leave it for 10 to 30 minutes. Afterwards apply your favorite moisturizer.

You may consider this lotion that is home made. Afterwards you will be amazed how good your feet feels. Consider it and see for yourself. 

Once you try this you will find that it will become a favorite. I love this and I am sure you will too.

For another way to to help relax tired feet feel free to read about it here.

I hope you like this article. Please share so others can benefit from it too. If you have any questions queries or suggestions feel free to comment below or contact us.  

Thursday, 17 August 2017

Revitalizing body mask and scrub in one DIY

This scrub can also be considered a body mask as it is nutritional for your skin. We all know how important moisturiser is. So why not have that wonderful facial mask effect all over. This I consider a mask and a scrub in one. This DIY scrub comes from my personal collection that I am sharing. I hope you like it.

Do you know what makes it so beneficial? Feel free to read it. 

So with that in mind let me share this DIY scrub. Decide whether on not you would consider this as a favorite in your collection. Your favorite diy home made mask.


Ingredients

5 strawberries cleaned
2 heaped table spoon yogurt
1 egg
80gram almond (ground, fine) 
1 teaspoon baking soda

Process

Mix ingredients together in a blender. To create a paste that can be applied all over your skin. Apply it on damp skin. Using circle movements apply all over skin. Going in the direction of your heart.  

Strawberries cleanse and hydrate skin. 
While almonds stimulate circulation and is an excellent scrub at the same time.
It is also good because it removes old cells and shows fresh younger skin. Which is one of many ways to fight the aging process. Want to know about other ways? Feel free to read it.

So there you have it. Simple diy recipe that you can make in minutes. You will feel refreshed and your skin will look clean. But I also feel it leaves that glowing effect.

I hope you like this article. If you have any questions comments or suggestions feel free to comment below or contact us. 

Please share so others can benefit from it too.

Tuesday, 15 August 2017

Danger signs of a stroke. Another sign was discovered. Read and save lives

I want to share an article that can help save lives. Many lose their lives just for not realizing the signs of a stroke. It is serious life threatening and one of the biggest cause of lives lost. So with that in mind. Please read this. You can save the life of those you love just with recognizing the signs. Or you can save your own life. By recognizing these signs


Warning signs of a stroke.

All the sings are sudden signs. Without cause or reason. So please take note of it.

  • There may be confusion. Or the person may have trouble talking as well as understanding speech.
  • Numbness can also be a sign. It can be on one side of the body, or it can be weakness that is felt in the face leg or arm.  
  • Another sign is trouble seeing from one or both eyes.
  •  Severe headache without a reason 


But now there is another sign that can tell the threat of a stroke. 
  • Ask the person to stick out their tongue. If the person sticks out their tongue and it comes out crooked or goes to only one side it is a tell tale sign of a stroke.


By this time you should call emergency services.  Immediately

So what can you do as a bystander and how can you tell the signs of a stroke? Just by the response to some questions you can find whether or not it can be tell tale signs of a stroke. Please do not ignore this.

  • Ask the person to smile. Ask the person to say something as easy as "chicken soup". It should be said coherently. 
  • Ask the person to lift both arms. 

If the person can not do this understand that the person's life is at risk as the person failed all tests and it should be dealt with seriously. Call emergency services and explain the symptoms.

Please share so it can save lives. Just by sharing it you can save lives of people you may never know. But they will be grateful that they saw this article. The power is in your hands. I was given the signs and I shared it with the hope of saving precious lives. I truly hope you will do the same.

If you have any comments, questions or suggestions feel free to comment below or contact us 

Face masks for different skin types

We all know how important it is to feel and look good. A home made facial mask is a good pick me up that can be seen and felt within minutes. So with that in mind I am sharing tried and trusted facial masks for different skin types.


Dry skin
Take one banana. (Not too ripe) 
Mash it with a fork that it can be applied to skin. 
Add a table spoon honey. 

Mix together and apply to freshly cleansed face. Leave it on for 15 minutes. Rinse your face with lukewarm water and apply your favorite moisturizer.

Normal or combination skin 
Take three table spoons honey. 
Add two tablespoons lemon juice. 

Mix well so that it makes a paste. Apply to freshly cleansed face. Leave on for twenty minutes. Rinse your face with lukewarm water and apply your favorite moisturizer.

Oily skin
Take two egg whites slightly mixed. 
Add one table spoon honey with one table spoon fat free milk powder to create a paste. 

Apply to skin that is freshly cleansed. Leave it for twenty minutes. Rinse your face with lukewarm water and apply your favorite moisturizer.

These are simple basic face masks that is suitable for different skin types. So if you are looking for a quick effective face mask that works. Why not choose the one for your skin type.

I find that it is effective for my skin type. The result is amazing. Fresh clean skin that shows it was pampered. I hope this works for you too. Please share so others can benefit from this article too. 

If you have questions comments or suggestions feel free to comment below. Or contact us.

Refreshing spray for your face

Did you ever consider that sometimes you may just need that feeling of a refreshed face. So what can be done? You can consider this recipe made at home. It is a truly revitialzing feeling. As well as refreshed. Best thing about it? You know what is added. And you can make this mixture in minutes.


Ingredients  

Witch hazel
Distilled water
Lemon flower oil
Water melon cut into pieces

Instructions

Put the watermelon into juicer
Pour the liquid through the strainer as you dont want the seeds. Now mix the witch hazel with the liquid.  You can change to lemon flower oil for dry skin. Dilute it with distilled water. Pour the mixture into a spritz bottle spray
bottle) Keep in the fridge. When ever you use this spray it gives a refreshing feeling to the skin and keeps your skin clean as well as balanced 

I find this spray truly refreshing. I hope that you will agree. Please share so others can benefit from it too.

If you have any questions comments or suggestions feel free to comment below. Or contact us.

Friday, 11 August 2017

Home made rinse to highlight your naturally

Sometimes just by adding one or two ingredients you can highlight your hair naturally. It is not as difficult as some would think. These are just a few simple ways to highlight your hair.


Blonde hair

All you need is one or two chamomile teabags with one liter water that was boiled.  Add the juice of a half a lemon.

By using this on your blonde hair you add golden blonde highlights


Auburn to brown hair

Pour a liter of boiling water over a handful of fresh rosemary. Leave it for 30 minutes to brew. Strain and use it as a rinse.

This natural rinse is ideal for auburn to brown hair. Also ideal for those ginger shades of hair.


Beer rinse for glossy and shiny hair.

Mix one part beer to three parts water in a jug. After shampooing hair you can use this water and beer mixture afterwards. Now you can rinse your hair for the last time with clean water to get rid of the brewery smell.


If you want other ways you can highlight your hair. Feel free to follow the given link and I am sure you will find one that you will like.

If you have any questions or comments feel free to comment below or contact us. Please share so others can benefit from this article too.

Saturday, 22 July 2017

Homemade all-in-one face mask for younger clear radiant skin for all skin types

I was on the verge of a skin break out which doesn't happen much to me despite having oily skin. So I knew I had to do something drastic. Result is a great facial mask that I just knew I had to share. I will however confess I got carried away when combining ingredients. But at the same time I knew what would be good for skin and wanted to make sure I handle a few things at the same time. Despite having oily skin I knew I had to give my skin some much needed pampering as well. Having oily skin doesn't mean you don't need moisturise. It just means your moisturiser should not be for other skin types and not have any unneeded oils. As your skin will be aggravated and it will be visible.


If you suffer from dull tired looking skin, need to focus on wrinkles, dark circles or even dark marks, irritated tired looking skin then you can try this. As this a home made face mask you will be amazed at the results. I have to admit I just combined things that I knew will be good for my skin. Each of these ingredients does something beneficial for skin. So it wasn't just a random pick. If you have made facial masks before you will know how beneficial each of these ingredients are.

What items did I use, you may wonder.
Oats
Lemon juice or juice of one lemon
Extra virgin olive oil, 
Banana, 
Cucumber
Tomato
Mint leaves that was freshly picked I used about 6. 
Now don't forget to add yogurt. 
If I had raw honey I would've added it. As it is good for many skin conditions.
While you are relaxing why not place two cucumber slices over your eyes as well

The cucumber came straight from the fridge so it was a cold face mask. Combine the ingredients and liquidise it in a liquidiser and make sure to make a fine smooth paste with it. Or a food processor if you don't have a liquidiser. Apply on your face and neck. I always apply the mask on my hands too. We use our hands so much but it shows age just as easily. Yet most forget that hands need pampering as well.  When applying you will feel it starts working on your skin within minutes. Personally I leave it on to dry completely as it has a skin tightening effect as well. I can say about 20 minutes then rinse off with lukewarm water (never use hot water on your face). Apply your favourite moisturiser or why not consider ending your facial treatment with a well nourishing oil such as castor olive or coconut oil for extra benefits. Leave it on overnight

As seen it was a wild made facial mask. But with these results. I keep doing this every day. I don't know if it is about the combined effect or if it is the fact that after I put on castor oil but it is stunning. But you can apply olive oil or coconut oil after face mask and leave it on overnight. It has so many nutritional benefits. 

I always make facial masks, not only for me but for my mother as well. She deserves the pampering too.  Some time other ladies use this facial mask as well. This is the changes I have noticed as following between all of us. Smooth clear skin that is well hydrated and slowly removes wrinkles. Skin looks radiant, fresh, nourished and well hydrated. Dark circles are lightened, it may even be gone. And that skin break out. That disappeared before it became a problem. Dark marks are lightened. Freckles are lightened as well, firmer younger looking skin that shows you gave your skin some much needed time. I am surprised at all the results I have seen. I call this the all-in-one face mask. I may improve it over time. But I am truly satisfied with it. I do hope you will approve it as well.

Sunday, 25 June 2017

What I did that worked for varicose veins

After receiving tremendous response on the article to remove varicose veins permanently I decided to share what I did. That worked! As well as explain a few things. Now many may feel no or may think why do it.  But for me. Time is something I do not have much off. I am sure many can agree with that also. Between my busy schedule and family. I can not see myself sitting for half an hour sitting and holding cotton wool. So after long consideration. I decided what I can do that will be effective for me. And yes it does work. Bare with me I will explain what I did.

I was about 20 when I first discovered that I like many others suffer from varicose veins. I thought I will have to live with it. And for a while I tried to make peace with that. So understand that you are talking to someone that knows exactly how it feels and how embarrassing it is. Not to mention it can be extremely painful as well. I covered my legs like most will that suffer from it. Going for surgery isnt something I would consider. Till one day I discovered there is natural solutions to help with it.


So to really make sure it can not happen again. It means that we have to think about our life styles and habits. Long standing or even being overweight can be a sure cause of varicose veins. Poor blood circulation is the culprit that causes varicose veins. As well as leaky valves. Blood circulation is so important and especially more when you suffer from this condition.  Why we get varicose veins will explain about a few things that has to do with varicose veins and what to do.

What you will need and what to do
Paper towel
Bandage
Apple cider vinegar with mother of earth enzyme (Bragg is one example)

With all that bare in mind that exercise is important as it improves blood circulation. 

I took paper towel and poured some apple cider vinegar on it. That soaked paper towel I placed on the specific area that had the varicose veins. I wrapped it with bandage. Put on pants to make sure it stays covered well and that it can not move. I went to sleep and the next morning I washed the affected area. Only to repeat it the next night. First thing I noticed is that on busy days my legs would feel painful. That changed the first day as I too tend to be busy and on my legs most of the day. It took time but I could see the varicose veins slowly go away.

Now many may say no and it doesnt work or other comments. It worked for me. And because of that I am sharing it with all who do suffer from it.

You can also check out the article on alternative home remedies and foods to consider. It may give a few ideas or ideas that will help with the condition.

I hope this may give you a few ideas or that it works for you. Please share so others can benefit from it. Feel free to comment below or email us. If you have any suggestions feel to respond.

Alternative home remedies that works for varicose (spider) veins. And foods that helps

After receiving tremendous response on the article to remove varicose veins permanently  I have decided to give a few other home remedies and foods that may help with the treatment for those who suffer from varicose veins. So with that in mind allow me to explain a few things. 

First thing to realize is that what you do matters. The way you sit really does matter. What you wear matters. When standing  for long periods of time. It does affect your legs and it can cause varicose veins. What you must remember about varicose veins is the real problem is veins does have valves. One way valves. It is supposed to make sure that blood flow goes one way only. But when the valves becomes weak. It causes leaky valves.That is when this condition occurs. As blood gets accumulated in veins instead of moving along to go through to the heart. it causes the appearance of varicose veins or spider veins


Some reasons for varicose (Spider) Veins can be 
Obesity
Pregnancy
Being inactive
When hormones is not balanced
Standing for long periods of time

Eating some type of foods may help treat varicose veins
Foods that has high fibre content as it helps to avoid or cure constipation which takes away pressure from the veins.
Cayenne pepper as it helps with blood circulation
Vitamin E rich foods as it aids circulation as well as contains a herb that has high capsaicin. So consider leafy green vegetables almonds and sunflower seeds as it has high Vitamin E content
Berries such as blueberries raspberries that is full of flavonoids. It helps to strengthen veins. Green tea is also full of flavonoids.
Seeds such as flax seeds and chia seeds that is rich in omega 3 fats. Relieving stress on veins.

Foods that cause spider (varicose veins)
Sugar as it leads to weight gain and it can cause inflammation.
Caffeine as it causes dehydration so it is not good for your veins. 
Alcohol should be avoided for that same reason as caffeine
Processed foods as it makes varicose veins worse by increasing toxins in the body. Sadly these foods doesn't have much nutritional value for your body.   

Again I repeat a few top remedies that works for varicose veins, as well as spider veins.

Horse chestnut. Take 100 mg a day
Reduces swelling and strengthen veins
Butcher's broom. Take 200 mg a day.
It helps to reduce inflammation in the veins
Grape seed extract. Take 200 mg a day
It helps to strengthen vein walls
Vitamin E. Take 400mg a day
It is a natural thinner of blood
Bilberry. Take 160mg 2 times a day
Helps to increase blood circulation
Witch hazel can be used to help remove the appearance of varicose veins. By applying it as a topical treatment. Same as with Apple cider vinegar with mother of earth enzyme.

Why we get varicose veins will explain about a few things that has to do with varicose veins and what to do. You can read it if you feel like it.

Treat the problem. And you will find that you cured the condition as well. Or as some would say cure the real underlying problem and you will cure the condition as well. 

I hope this article answered your questions as well as gave a few other alternatives that will work for you. Please share so others can benefit from this article as well 

If you have any comments suggestions that worked for you or queries feel free to comment below or send an email. 

Tuesday, 6 June 2017

Keeping warm on those cold cold days

Winter time can be pleasant for many. But at the same time we realize we miss the warmer days. Especially when night falls and the cold sets in. So with that in mind I am sharing a few tips to stay warm. But also safely warm.


Fireplace
If you are fortunate enough to have a fireplace dont be afraid to use it. Off course safety is important. So if you can not use it with safety then rather avoid that. Although I have to say I think that is one very cozy way to have the family together around a fireplace. Thinking of all those family movies that shows a very delightful time. Yes time spent well indeed.

Using a heater
If you feel it is a good to use a heater. Remember the three feet rule. Stay a distance away from it. And make sure that it isnt a hazard to your family or health either.

Electric blanket
I dont think there is anything quite as nice as getting into a warm bed on a cold evening. It is cost effective as most tend to save power in some way. But at the same time it can keep the chills away too. But do to take note of all the safety measures and precautions.

Dont forget to layer up
To wear an extra shirt or leggings is a good way to protect yourself from the cold weather. Consider gloves or mittens. If it is very cold use a hat also. Dont be too shy to think of winter socks. Nothing quite as painful as cold painful feet and toes.

Warmer foods
It is good to consider hot coffee or tea. Or hot chocolate drinks. As well as soup or spicy food to help keep you warm during those cold winter nights.

Alcohol is a no no
Yes I know some will say but,,, It feels warm. Sorry people the fact is that alcohol actually decreases your body's core temperature. A study done by Army Research Institute of Environmental Medicine showed that your body loses the ability to shiver when drinking alcohol. Yes alcohol can make you sweat even when it is very cold. That obviously cools your core temperature too. So next time leave the alcohol and go for the hot drinks that will help you stay warm.

Layer your covers and blankets
Start with your cozy fuzzy and warm blankets first. And putting your thin dense blankets last to help  make sure that heat wont escape. Keeping your bed warm and cozy.

Bake and cook to your heart's content
Using the oven helps spread heat through out the house. Making it pleasant and warm.

Remember a warm bottle
Always a good idea to use a bottle to help keep cold weather away. If you don't have one. Take a two litre bottle that is rounded and nice. Like a Coke bottle. And fill it with hot tap water. Now use that. You will be surprised as it keeps you warm but at the same time it lasts for hours. I still do this every winter. Or even on cold days.

Staying dry
It is very important to stay dry if it is cold and rainy weather. So dont forget to use a raincoat or an umbrella. 


And one of my favorites.
If it is very cold outside and its just slowly crawling up your spine. Consider a nice warm bath. Nothing beats the chills quite like that. I dont think of showers when it is cold. I think of soothing warm baths. Where all that ice cold coolness is slowly drained and all that is left is a pleasant warm feeling from the bath

These are just a few simple ways to stay warm on cold days. But it is effective against freezing cold weather. Life is a learning process after all. Thanks for reading this article. I hope you found it helpful. I sure did. As it is winter and very cold here.  

If you have any questions, comments or suggestions feel free to comment below or contact us.
Please share so others can benefit from this article too

Monday, 5 June 2017

Body wrap for effective weight loss DIY

Consider this only if you think of losing weight for that special day or date. This works but lasts maybe one or two days. The secret is losing water weight. If fat loss is your goal. This doesnt helps you lose body fat. Although some will say that Vicks can help with fat burning. Don't hesitate to consider this effective home remedy. It is a full DIY project. Not only is this simple to do. But also a very cost effective version of the more expensive treatments that you can get.


But with all that said. Many will swear by the effectiveness of the body wrap. There is a variety of ways you can do a body wrap. It can be as simple as only 3 items to much more items needed. The choice is yours.

3 Item body wrap for weight loss

  • Plastic wrap
  • Body lotion/Vicks Vaporub
  • Bandage


  • First start by applying a thick coat of body lotion or Vicks Vaporub on the area you want to reduce inches on the desired area. It should not be rubbed in completely!
  • Now use the plastic wrap and apply it on the area. Wrap it around the entire area a few times. Make sure it is tightly but dont forget you will have this on the whole night. So just comfortably snug is advised (Areas such as upper arms, tummy thighs)
  • Now wrap the bandage around to secure the wrap in place. Cover the plastic completely
  • Go to sleep and see the results the next morning.

You can use either body lotion or Vicks Vaporub. The camphor in Vicks Vaporub can be used to helps stimulate fat burning. But many will tell you this is not a permanent solution for weight loss. As it will only work for a short time. Maybe one or two days. As it helps your body lose water weight. Which will be recovered as you rehydrate. Yes rehydrating is very important for your body as it needs water to function properly.

It is still a way to lose weight. But most important. Never forget that a sensible diet and exercise is vital and most effective for weight loss. Also take note that losing water weight means dehydrating as it is just helping your body lose water weight. So it can easily return as well. So a sensible lifestyle is vital for weight loss.

Please note!!!
This body wrap is not recommended for someone that is diabetic, has high blood pressure, if you are pregnant or if you suffer from any medical condition. For safety please consult your physician or doctor first.

If you have any questions comments or suggestions. Feel free to comment below or contact us.
Please share so others can benefit from it too

Friday, 19 May 2017

Combining 3 ingredients will help you lose belly fat fast

Most look and say I can accept everything except this flabby belly fat. But what to do? If you are one of the many who feel like this. You really are not alone. Exercising and eating right is the right way to go. But what about helping your body with a much needed boost. 

There is tremendous health risks to belly fat. Life threatening risks. Diabetes, liver disease, high blood pressure, stroke and many more dangerous health risks. So why not try this drink and improve your weight and health at the same time. 


Ingredients
Handful of fresh parsley
1 lemon
Half cup of water

Take a handful of parsley and put in a blender.
Squeeze out the juice from the lemon and add it to the parsley that is already in the blender.
Now add the water
Mix everything in the blender making sure everything is smooth
Drink this every morning on an empty stomach
You can do this for 3 to 5 days.

Please note
If you haven't reached your desired weight. Please take a ten day break before starting with this drink again for another 5 days. Continue this cycle till you reach your goal weight 

Why it is effective
Lemon as many will know helps to get rid of excess water weight and gets rid of fats within the body.
Parsley is effective because it has the vitamins that helps for improved digestion 
Both together these two helps to boost your metabolism 

There is a variety of ways that is effective for helping you lose weight. This is just one of many ways. But it is effective and cost effective as well. As well being all natural and safe.

If you have any questions comments or suggestions feel free to contact us or comment below
Please share so others can benefit from this advice too

Monday, 15 May 2017

Natural skin moisturizers that is found in your kitchen

If you want to use natural moisturisers. Then look no further. As you may already have any of these products in your kitchen cupboards.


Olive oil.
It isn't even strange that olive oil would be named as it is full of nutrients and an added bonus. It has Vitamin E which is great for skin, It also encourages smooth and well nourished skin. Perfect for all over body pampering.

Want to know why it is good to use olive oil? Then check here.

Method
Start by rubbing some lukewarm olive oil all over body. Hands, legs, as well as the other areas that you feel need that extra nourishment.
Leave for at least 30 minutes before taking a shower.

If you have scars you can consider olive oil. Pure virgin olive oil gets rid of scars effectively

This can be done daily or more as you need. Choice is yours. But the benefits will have you wanting more pampering. 

Coconut oil
Another great moisturiser that works great for skin. Another great beauty secret. As it helps to keep your skin hydrated supple and well nourished. Another added benefit is that it gives extra nutrients that your skin needs.

If you want to know more tips about coconut oil read here

Method
Warm some coconut oil for a few seconds.
Apply all over your skin. Gently massage your skin. Leave it on for at least ten minutes before taking your shower or bath. Which ever you prefer.
Again you can do this every day or a few times a week. Choice is yours.

If you want to know why it is good to start using coconut oil. You can read about the benefits of using coconut oil

Coconut oil is non greasy which makes it ideal for all skin types including oily skin.

Honey
Ohh wonderful honey. Not only does it sweeten tea and have many health benefits. Again it is mentioned for skin. For your skin this will be well deserved pampering session. Honey penetrates to the deeper layers of your skin. Moisturising where it is needed most. But at the same time it helps to keep that need moisture locked in your skin.

For other benefits of honey feel free to check here

Method
Take 2 tablespoons whole milk and 2 tablespoons honey. Mix and apply on skin. Leave for 10 minutes. Now take your bath or shower. This can be done daily or when it is needed.

For extremely dry skin you can apply the honey directly on skin where needed . Leaving it for 20 minutes before rinsing it off.

Feel free to read Honey and lemon facial mask

These are just a few natural moisturizers that can be used. It will change the appearance of your skin. Hydrating it as well as giving needed nutrients. Go ahead try this and feel the difference for yourself.


Please share so others can benefit from it too
If you have any questions comments or suggestions feel free to comment below or contact us

Wednesday, 3 May 2017

Lightning effect nail art

If you want really stunning ideas on nail art. Then look no further. Here is yet another suggestion that looks complicated yet is easy to do. This lightning effect really makes a clear statement. 


Items needed
Black colour nail polish
White blue, white and purple nail polish
Micro tipped pen
Sponge
Clear coat nail polish (Optional)

Instructions
Start by applying the black nail polish
Now combine white blue, purple and white nail polish colours
Use the sponge to apply those combined colours on your nails
Take the micro tipped pen and create lightning strike effect
You can apply clear coat nail polish to give your nails that smooth effect, if you prefer


Expert level
Beginner


Yet another stunning idea that has a clear and visible effect. 

If you have any questions, comments or queries feel free to contact us with a comment below or contact us. Please share so others can discover this idea also.

Creating nail art with scotch tape

If you love doing your own nail art designs and you are a beginner. Yet you want a sophisticated and glamourous look. This might just be for you.


As seen in the image this is yet another easy design. All you need is some imagination and you end up with beautiful nails such as this one

Items needed
Scotch tape
Base coat nail polish (Here pink was used)

A few more colours of nail polish Colours as you prefer
You can use a clear coat nail polish if you prefer it


Instructions
Start by applying the base coat.
Leave it to dry completely.
Cut the desired shapes with the scotch tape and put on nails to create the desired form.
Remember cover what you want showing. 
Apply your colour nail polish
Leave it to dry

Now you can add the scotch tape again to do the same thing.
Apply another colour nail polish.


Repeat this until you have the desired result
You can end it off by applying a clear coat nail polish if you prefer


Expert level
Beginner


This is just another example of what you can do with your nails. It is cute and glamorous at the same time. I hope this article helped you to find your creative side and ponder on what you can do.

Please share so others can benefit from it too. If you have any suggestions, comments or advice you can share it by commenting below or by contacting us.

Monday, 1 May 2017

Easy stripes design nail art tutorial

Another easy DIY nail art tutorial. It looks difficult but is so easy to do. You can choose your own prefered colours. Always remember that these are just suggestions to inspire you.


Items needed
You will need a base coat nail polish
A few different shades nail polish

Clear nail polish (optional)
Fan brush


Instructions
Start by applying your base nail polish. Leave it to dry completely.
Now using the fan brush you can apply fine lines. By dipping the fan in different colors of your prefered shades of nail polish.
Leave each coat to dry before applying a new colour.
You can end it off with a clear nail polish top coat if you prefer.
As seen in the image it should be done horizontally.

Expert level
Beginner

Another easy idea to try. I hope you find the fun in it. Try new ideas. You may love it and inspire those around you. I hope you enjoyed another fun idea to try.

Please share so others can find their inspiration too. If you have any questions, queries or comments feel free to contact us or comment below.

Lovely flower nail art tutorial

Haven't done any nail art in a while. So here is another idea if you want to try it and you just starting. If you love the idea of nail art. But you just cant seem to find your way around the diy department. Then this tutorial may just be for you. Easy and beautiful. But most. You did this yourself. 

Feel free to check the other nail art ideas here

Items needed
Base coat nail polish
Red nail polish (or your prefered colour) as well as a lighter shade
Green nail polish (or your prefered nail polish
White nail polish
Clear nail polish (optional)
Bobby pin 

Instructions
Start with applying your base coat.
Now using a bobby pin make the red circles.
Remember to add some green as seen on the image. (Around the red circles to represent the leaves.)
Now by adding some white on the flower image
Now you should have a complete image.

You can end it off by adding some clear nail polish. 
But good to refer to the image as seen and you will have lovely easy flower nail art.


Expert level
Beginner

Hands gets noticed. Lovely nails that shows some extra care always tend to be elegant. So dont be afraid to try something different. This DIY tutorial is the perfect idea if you feel out of your depths when trying nail art. But as said it is good to refer to the image if you feel unsure. 

I hope this is just the start of so many ideas you want to try. Please share so others can benefit from it too. If you have any comments, questions or suggestions. Feel free to contact us or comment below

Saturday, 22 April 2017

Home remedies to help alleviate pains associated with PMS Premenstrual syndrome

Some have mild symptoms. Others suffers severely. But all women know that it is not a happy time. From your teen years to the next stage in your life you deal with this issue. Yes I am talking of PMS as women call it. But mostly known as premenstrual syndrome. So what can help to relieve the symptoms? Many look for medication to cope with the cramps. Mild to severe cramps can be most uncomfortable. But here is a few simple home remedies and added advice too


For other ways to help deal with menstrual cycle and cramps. Please follow this link.

Ginger
If you drink ginger tea you will help to soothe the aches and pains. Take ginger that is grated and boil in water for 5 minutes. Strain and add honey. Drink this a few times during the day.

Apple cider vinegar
Take a glass of water and add 2 tablespoons apple cider vinegar. Drink a few time during the day.

Vitamins and minerals
Calcium helps because it helps to balance your hormone levels. Thus relieving symptoms of PMS
Magnesium is effective as it helps by reducing PMS symptoms such as bloating headaches and migraines caused by PMS. Fluid retention and tender breasts can also be alleviated. 

Leafy green vegetables, beans, seeds nuts as well as bananas is filled with  the needed nutrients that your body need during this time. 

Blackstrap molasses
Blackstrap molasses is full of calcium and magnesium and many more nutrients. So good to consider it too. Just take a spoonful with a glass of milk daily 

Exercise
I know it is the time you feel like exercise can be the worst thing. But exercise can help to alleviate pains. As long as it is mild exercise and as an added bonus you will feel much more fit. 

So with these home remedies you can help to alleviate the pains and aches. I really hope this helps
Please share so others can benefit from it too
If you have any comments suggestions or questions feel free to contact us or comment below

Please like and share

Subscribe here

Recommend us on Google!