Follow us on Social media

Home remedy for removing varicose veins permanently

Most think that only surgery can help with the treatment of varicose veins. How many would agree that apple cider vinegar can not only help deal with it? But can also treat varicose veins?

Consider fat loss instead of weight loss and see effective results

Consider fat loss instead of weight loss and see effective results

How to learn being more grateful and why you should do it.

It is said that being grateful has tremendous health benefits. Are you grateful? Do you know why it is good to be grateful? It is a sure fact that in life we both find a lack and an abundance.

Home remedy that promotes hair growth

If you are one of the people that worry about the health of your hair. This article is just for you. As I am sharing a natural safe home remedy that has so many nutrients for your hair. All you need is two ingredients. You probably have it already in your kitchen.

https://blogger.googleusercontent.com/img/b/R29vZ2xl/AVvXsEh2c4LUvAQz8UAuG51GchSA8sTUJdMogSkZwewHJdgCCpyybNsEuR-DSxR580ojjXmUy8aCtdy7MVcXN8xqceTWA32AHIRKdhnTgUxJQHhsHW50lZqAYlpAT8CLqJJ6FV-qX53rbew7pL0x/s320/Feb-healthy-heart-1.jpg

Heart health changes that should be implemented daily

Your heart. I am not thinking of your feelings or your love for someone. But about heart health. It does affect everyone especially if we don't choose a healthy lifestyle.

Showing posts with label DIY. Show all posts

Monday, 21 February 2022

Rice water facial cream for wrinkles. Also good for body and hands.

 Have you ever looked at the Korean ladies? Their skin is flawless even when they are considered older. You may wonder why is that. One of their many secrets is the way they use rice. Yes you can consider it a food. But it is also considered part of their beauty routine.
And not just a part but a major part of their beauty routine. 
Why can rice be added to your beauty routine? Well if you read previous articles on this site about rice you will know it has lots of vitamins and minerals. But it also helps to lighten skin. Can be considered a skin tightener and gives that flawless glass skin appearance. So its a win all the way.


You will need 4 ingredients.

2 Tablespoons Petroleum jelly. (I use Vaseline)
2 Tablespoons baby oil. (I used Johnson & Johnson)  
3 Tablespoons rice
1 Cup water

Instructions for the rice water.

Fermenting the rice.
Put the rice and water into a container overnight. 
Very important for the fermenting process. 
The next day you can continue this home made cream.
Rest of the process.
Place the water combined with rice in a pot. Put on stove on medium to lower heat. Stir frequently. When it has evaporated most of the liquid. Remove it from the stove. Place in cool water and add the baby oil and the petroleum jelly. Pour it into a container. This cream can be used for about a month. 
It can be used for the face, neck, hands and body. You will see the results and benefits within a short time. 
If you want to have more information about what rice water is good for. Follow the given link. 


I hope you will find this article beneficial. Please share so others can benefit from it too.
If you have any questions, comments or suggestions feel free to comment below or contact us.

Tuesday, 29 June 2021

DIY Botox Face mask for younger wrinkle free skin

 What if I tell you there is a safer option for wrinkle free skin than going for botox treatments? What if I can tell you this botox face treatment can and WILL help eliminate the appearance of wrinkles. Leaving skin younger and even radiant. Without the dreaded side effects of botox. It uses all natural ingredients. Interested? I know I was.


Would you be interested in knowing what exactly is this mask made off'? Truth be told you may even have all the ingredients in your kitchen. But more importantly. it is safe. No bad surprises later on or dare I say regrets. The best part about this mixture. You can store left over mixture in the fridge. So here it goes.

Ingredients

1 Tablespoon cornstarch
125 ml. cold water.
100 ml. boiling hot water
5 tablespoons carrot juice (fresh carrots used) 
1 tablespoon sour cream

Method

Pour the cornstarch in a pot. Next add the cold water. Make sure the mixture is mixed thoroughly.
Add the hot water. Turn plate on. Make sure it is on low heat. Stirring the mixture with a spoon till it starts to thicken. Make sure to stir so it doesn't burn on the stove. 

Next pour the mixture in a glass bowl. Allow to cool down before you add the rest of the ingredients. 
Add the carrot juice. And last add the sour cream. Mix thoroughly. 

How to use

Start by washing your face. This mask works best while the skin's pores are open! Apply the mixture on your face. Making sure that you massage your skin at the same time. Leave on for 30 minutes. Rinse with lukewarm water. Please remember to apply your favorite moisturizer.  

Again take note this mixture can be kept in the fridge. Apply this mask on your face once a day. You will notice a change in your skin's appearance within a relative short time. It can be from one week to two weeks. 

I hope you will love this face mask as I do. If you found this article helpful. Please don't hesitate to tell others as they will notice the changes too. 

Please share so others can benefit from this article too.
If you have any questions comments or suggestions. Feel free to comment below or contact us.

Sunday, 6 June 2021

Using pineapple as an effective anti aging product for skin

We love to add pineapple to food as it has the ability to make it so much more flavorful. But what if I tell you that you can use it as part of your beauty routine. That it is considered a great product in the fight against aging skin. It slows down the aging skin because it is filled with antioxidants and alpha-hydroxy acids. That means it fights the effects of skin damage. Remember pineapple is loaded with Vitamin C. So it can reduce the appearance of fine lines and wrinkles.


Pineapple is considered a natural astringent for skin. Within moments of applying you can feel the tightening effects it has on your skin. You may even see a change in any fine lines and wrinkles within a very short time. Try it and see for yourself. 

Method one

You can simply apply the pineapple juice on your freshly cleansed skin. But avoid sensitive areas. Leave on for five minutes. Rinse your face with lukewarm water. Follow your normal beauty routine.

Method two

Or if you feel you want more than the usual benefits. Consider adding a small amount of coconut milk.

Ingredients

4 fresh slices pineapple
2 Tablespoons coconut milk. 

Method

Put the coconut oil and pineapple pieces in a blender/ Blend till you finally have a paste to apply on freshly cleansed face. Leave on your face for 5 minutes. Rinse with lukewarm water. Gently pat dry and follow your normal beauty routine.

You will use this anti aging face treatment regularly once you tried it. 

I hope this article helped you. Please share so others can benefit from it too.
Please share so others can benefit from it too.
If you have any questions comments suggestions or even tips feel free to comment below or contact us

Honey and Aloe Vera anti aging serum

 If you are a regular reader of this site. You would have noticed this site is about healthy natural safe alternatives to products that works.Today I want to share a serum that is left on the skin overnight. But the effects will have you amazed. It treats blemishes, wrinkles fine lines while leaving your skin radiant and visibly smoother and soft. Interested to know what this serum can be?


Feel free to check the honey face mask that will have you in awe here

Once you tried it you will make it regularly. You will notice an improvement in a very short time. If not overnight. Your friends will notice the change and "yes" they will ask you what is your secret. So the ingredients/ 

Ingredients
1 Teaspoon raw honey
1 Tablespoon Aloe Vera gel
Half teaspoon cucumber seed oil. If not available feel free to change to your favorite alternative. Just as good.
1 Teaspoon glycerin

And off course the container. Please make sure it is sterilized.

Start by adding honey in a bowl that you will be using to mix the ingredients. When you see the honey has become more liquid, add the Aloe Vera. Make sure to mix it thoroughly. Next add the oil. And last add the glycerin. Mix it thoroughly to make sure everything is combined well. After that pour into your container that is sterilized. Leave it for 3 hours before use to make sure it infuse properly. 

If you are looking for an easy face mask that works. Check here

How to use

Before going to bed. Make sure to apply this anti aging serum on freshly cleansed face. Leave it on overnight. Rinse face as normal. Dry skin gently. Follow your normal facial routine. You should notice your skin is very soft. Radiant and fine lines minimize. 

I follow this as part of my beauty routine. So I am sharing a highly effective serum that will have your skin feeling pampered and loved.

I hope you found this article helpful. Please share so others can benefit from it too.
If you have any questions, comments or suggestions. Feel free to comment below or contact us.

Tuesday, 23 March 2021

Using these three ingredients you will treat varicose veins fast.

 If you suffer with a condition known as Varicose veins no doubt that you know not only can it be painful. But also at the same time you can feel uncomfortable. Because it does affect self esteem. As it can be considered unflattering and unsightly. So here is another treatment for Varicose veins. Combining these three ingredients makes it more powerful in the fight against varicose veins.

If you want alternative home remedies that work for varicose veins. Press here

Garlic

Within garlic there is a compound known as Allicin that helps the veins in your body from becoming inflamed. Garlic is known to remove the toxins from your body. But it is also good for overall health. If you add orange juice and olive oil. It becomes powerful in the fight against varicose veins.

Method

Start by crushing 6 garlic cloves. Pour the juice of 3 oranges in a container. Add the crushed garlic. Now add two table spoons olive oil to the mixture. make sure everything is combined.

Very important. Leave this mixture for 12 hours before using it!!!

Apply this mixture on the affected area. Make sure to leave it on the affected areas for no less than 15 minutes. Rinse with cool water.

Please note
For even better results add garlic to your diet. You should see an improvement quite fast. 

If you wonder why we get varicose veins feel free to check here

If you have any comments suggestions or questions feel free to comment below or contact us. Please share so others can benefit from this home remedy 

Cabbage for Varicose veins Try this you will be amazed

 After doing some research I came across this unique home remedy for varicose veins.
Chances are you may already have the ingredient at home. Not only is this product edible but also good for varicose veins. 


Why is it so good for varicose veins?

Thinking about cabbage it shouldn't surprise you that it can be used to cure varicose veins. It is a rich source of vitamins, minerals, potassium, calcium and magnesium to name a few. Because of this it can reduce the swelling that is caused by varicose veins. 


Method

After chopping cabbage leaves place it a blender.
Add a small amount of water. You want to make a paste. So watch carefully and see if there is more water needed.
Now apply the paste on the affected areas.
Put cloth over the affected areas. 
Leave it for two hours.
Rinse with cool water.
Continue this process for a period of one month. More if needed.


Some prefer to go to sleep and wash it off the next morning. 
It is a personal choice. 

You should see an improvement in a relatively short time. If you suffer from painful varicose veins you will see a relatively quick improvement from pains associated with varicose veins.

But please take note. Healthy blood circulation is important. That means it is important to have an active lifestyle.

If you have any questions comment or suggestions. Feel free to comment below or contact us.
Please share so others can benefit from this great home remedy too


Saturday, 12 September 2020

Highly effective home made cream for sore hands. DIY

Suffering with sore hands can be a problem as we use our hands for almost everything. So I was told about this great mixture that made a huge difference. You will keep this in stock once you discover how good it works. 


Please note
As it is essential oils please keep strictly with the amount given. Essential oils can be quite strong. As good as essential oils can be. Please remember that too much of a good thing can be harmful. This mixture is already strong. So no need to add more. But this cream is highly effective.  

Ingredients
500 ml. aqueous cream (of your choice)
40 drops rosemary oil
40 drops marjoram oil
10 drops lavender oil
10 drops tea tree oil

Method
Mix everything with the aqueous cream. Use this mixture minimum 3 times a day. In the beginning you can apply this cream every 30 minutes if you want too. 

You will find that this home made cream has a pleasant smell. So why not try this for yourself. The lady that shared this advice with me. Is someone I know and even I noticed the difference. So I asked her the secret. Here I am sharing it with you. So feel free to share this with others. No one should deal with pain. 

I hope you found this article helpful. If so. Please share so others can benefit from it. If you have any questions, comments or suggestions. Feel free to comment below or contact us. 

Friday, 11 September 2020

Home remedy to get rid of Gout attacks forever safely at home.

If you are one of the millions of people that is unfortunate enough to know the pains and aches associated with gout. Then you know how extremely painful this condition can be. 
The remedy I am sharing today comes from an alternative health practitioner. Yes everyone who used this recipe found relief quite fast. Do I trust it? Yes very much. As I am sharing it on here. 


But before you wanna know what to do. Realize that gout is a type of arthritis that is caused because your body has too much acid. More specific uric acid. Apart from the fact that this home remedy helps neutralize uric acid. Please bare in mind that the real culprits needs your attention too. On the plus side this mixture has other benefits too. It is mentioned later in this article.

Some of the foods and drinks can actually help your body create more acid than is necessary. End result. You experience extreme and uncomfortable pain. So what changes should be considered?   

First the no no's
(That means less of these)
Sugar. You had to guess this one would be added. As sugar turns acidic. 
White flour products. 
Too much meat. Red meat to be specific. 
Beans. This one was shared by a doctor as beans also causes too much acid. 

Now the yes please. 
(Meaning do this more often)
Consume more fresh fruits and vegetables.
Eat more vitamin C rich foods. Such as cherries
Use hot or cold compresses when you dealing with the pain caused by Gout. 
Water. Realize that water helps your body get rid of the uric acid. 
I have seen the difference that water can make with people who suffer from gout. As much as I have seen the severe pain it can cause. So please. Drink more water. 

The remedy

The ingredients
1 teaspoon turmeric
1 tablespoon apple cider vinegar
1 Tablespoon honey
(1/2)Half teaspoon ginger
(1/4)Quarter teaspoon cayenne pepper
(1/4) Quarter teaspoon black pepper (it helps the body absorb the turmeric)
1 Teaspoon coconut oil

Method
Mix all these ingredients with a cup lukewarm water. Drink this mixture on an empty stomach. Which basically means drink this before you eat or drink anything in the morning.

Added benefits of this home remedy.
It cures Gout. Arthritis, High blood pressure, Can improve your cholesterol, Boost your body's immunity. It is even rumored to help against cancer. But I can not say whether it is a fact. Or not!

The person that I saw suffering from gout attacks used this and it worked for him. So from his perspective it was worth trying.

With all this said. Why not try this mixture the next time you dealing with a gout attack. You may discover that this mixture is the secret you waited for all the time. Try and see for yourself. You will be sharing it with other people that suffer with this form of arthritis.

I hope you found the answer you wanted in this article. Please share so others can benefit from this article too. If you have any questions, comments or suggestions. Feel free to comment below or contact us. 


Thursday, 6 August 2020

Coconut and aloe vera hair mask for strong healthy growing hair. DIY

So I discovered this perfect way to help grow your hair. Bit the good thing about this home remedy is this. It is safe and natural. And you can do this over and over again. Not only will it help your hair to grow but it will be thicker and stronger. If you have trouble with hair fall. This is perfect to use. You will make this mixture again and again.

It is a mixture of products that is known for beauty and hair boosting abilities. So it would be known to many already. This combination works. This is tried and tested. And just in time as I myself want to grow my hair. So why not share this great remedy for hair growth. 
Ingredients

1 cup coconut oil
2 Aloe Vera leaves.
Juice of one onion
1 teaspoon cinnamon powder

Method

Put the coconut oil in a pot. Boil it. Add the Aloe Vera leaves. Let it boil till it reaches a light brown color. Remove from the stove. Now add the juice from the onion and the cinnamon powder. Mix well. Pour the mixture in a bottle or container. Use this mixture once a week. Leave it on for 45 minutes. Afterwards wash your hair as usual and style as preferred. 

If you have any questions comments or suggestions feel free to comment below or contact us. Please share so others can benefit from this post too.

Monday, 6 July 2020

Home made banana and avocado foot mask. Fix cracked dry heels real quick.

Your feet. So very important. But do we take note how our feet look? What about a pampering session for your feet. Yes as your face, hands and body, your feet need some pampering too. Especially if you find you have dry or cracked heels. This home made foot mask is safe and you can make it anytime. Best part. You need only two ingredients. So why not try this at home. You will want to do this again.


Ingredients

Half avocado
One banana ripe

Mix the avocado and the banana. Apply the mixture on your feet, especially your heels. Leave it on for 15 - 20 minutes. Cleanse and rinse your feet with lukewarm water. Dry feet. Apply your favorite moisturizer.

This home made foot masks is especially ideal if you need to take care of your heels. It softens the skin. To help soften skin please do this daily till you are satisfied with soft heels and well moisturized feet.

Why does this mask work?

Avocado is known for its oils and fats. It is used in many beauty routines for dry skin because of its healthy nutritious oils. Banana on the other hand is an ideal moisturizer for your skin. The result is soft well moisturized and smooth skin. 

This is just one of the many home made masks you can try. If you have any questions, comments or queries feel free to contact us or comment below. Please share so others can benefit from this wonderful home made mask too.

Sunday, 1 March 2020

Making your own Kombucha tea at home. The health craze that took the world by storm

And finally as promised here is the recipe to make your own Kombucha at home. If this is the first time you are here on this site. Please check the article about what you have to know before making Kombucha if this will be the first time you make it. As it is vital to know the do's and the dont's when making Kombucha. And if you don't have scoby that is needed to make Kombucha. Please check the previous article. It tells how to make your own scoby for Kombucha at home. 


Why would it be considered good to drink Kombucha. Known as the tea that has been fermented with mother of mushroom. Because of the scoby. Because this sweet healthy drink that has lower amounts of sugar. But is also good for gut health. It is filled with Vitamin B, antioxidants and also folic acid. Kombucha tea is also full of probiotics. Among other things. 


How to make Kombucha at home.


Ingredients


  • 3 liters water, boiled. You can use filtered water.
  • 5 tea bags. It can be green tea, rooibos or black tea. The choice is yours.
  • 1 cup Sugar. Raw or white sugar. Again your preference
  • 1 Scoby. Do remember if you don't have scoby the previous article gives you the recipe to make your own home made scoby.
  • 1 cup Kombucha is needed from the previous batch.


Instructions

Combine the water and sugar in a saucepan. Place it on the stove. Let it simmer on low heat until the sugar is fully dissolved. Remove from the heat. Now add the tea bags and let it cool down for up to an hour. 
Remove the tea bags. Leave the mixture to cool till it reaches room temperature. Now make sure to use a sterilized glass container for the next step. Add the freshly made tea in the container. Add the scoby and the Kombucha tea. Place a dish towel over and make sure to place a rubber band to secure the towel in place. 

Place the freshly made Kombuca in a warm place, but make sure it isn't in direct sunlight. The room should be between 24 to 32 degrees Celsius. Leave the mixture for minimum 10 days. Do not disturb it. Just let it work it's magic. 

Remember that a new baby scoby will develop in this time. It will have a sour taste because the scoby will feed on the sugar that was added. Which is why the sugar is a vital step in making Kombucha. It will be ready when the sour taste is fully developed. Strain the Kombucha. You can use a plastic sieve. or you can use a coffee filter. But do not. I repeat do not use anything metal! 

It is important to leave the scoby and one cup of the Kombucha to start making a new batch Kombucha.  

Please note that when a scoby is forming it will start to look a bit gelatin. If it should start to form mold you should throw it away as it can be harmful. The harmful mold is known as Aspergillus.

With all that said. I hope you will discover why it is becoming one of the most popular health drinks. If you have any questions or have a comment. Feel free to comment below or contact us.

Saturday, 29 February 2020

Making your own Scoby for Kombucha at home

As the last article mentioned today we will discuss making Kombucha. But after intitial thoughts I decided it is best to discuss how to make your own scoby for Kombucha. Which is off course the most important part of Kombucha tea. The big secret. You can purchase scoby or get at least a quarter from anyone you know. But I think it is best to give an article on growing your own scoby for Kombucha.
Please read the previous article if you want to make your own Kombucha. As it is good to know the precautions to take before making this wonderful and healthy tea at home.

Process to make Scoby for Kombucha.

It is vital to purchase a bottle of raw unflavored Kombucha. As that is what you need to grow your own scoby. Also known as mother of mushroom. Pour the kombucha into a container or jar. Preferably glass. Now leave this aside for now as we continue the next step. 


Use a separate container, jar or cup to make your own tea. Make 1 cup tea. Whether it is green tea, black tea or rooibos. It is your personal preference. As each has their own unique health benefits. Pour hot water into container. (just 250 ml to 300 ml will be enough) Now add sugar. 2 table spoons should be enough. The sugar is a vital part of the process. The scoby feeds on the sugar so do not leave the sugar out of this process! Leave it to cool down until it reaches room temperature. When it is cooled down add the freshly made tea to the Kombucha. Now make sure to cover the container with a dish towel. You can use a coffee filter too if you prefer. But make sure it is sealed tightly with a rubber band. This whole process should be kept very hygienic and clean! 

Place the tea in a warm spot. Temperature should be between 68 to 85ºF . (20 to 29ºC) But out of direct sunlight. It must be left for at least 7 days so a new scoby can form. After a week you should see what is called a baby scoby as it develops on the surface. 
So how should it look? 

A Scoby when it is starting to develop looks translucent and clear. But as time passes it start to change color looking less translucent and clear, white and thicker. It starts to look like gelatin. Leave the scoby to form till it is at least a quarter inch thick before making your own Kombucha. This process can take a month. If after three weeks you dont see a scoby forming you can throw you can start this process over. 

Next article will share the Kombucha recipe. As the first article mentioned why it is good to make Kombucha. Also the precautions. This article is about the process to make the scoby that is need to Kombucha. And the next article will be about the process to make your own Kombucha at home. With the scoby we just created. 

I hope this article and the other articles helps you in attaining better health. But also a more rewarding lifestyle. If you have any questions, comments or suggestions. Feel free to comment below or contact us. We look forward to hearing from you. Our readers.  

Please share so others can benefit from this article too.      

Wednesday, 9 October 2019

This DIY hand and body cream is so nutritious for your skin. You will make it again and again.

The previous article I mentioned a wonderful facial cream that you will use again and again. It can even be used as a body cream. But now I want to share another hand and body cream. Especially if you suffer from dry skin. And even if you don't have dry skin. You will love this cream. Because it is highly nutritious for your skin. It also smells wonderful


Ingredients.
500 ml aqueous baby lotion
250 ml Vaseline
250 ml Vitamin E cream

Mixture
Whisk everything together to mix all ingredients well. 
It should look like icing when you are done mixing.
Pour into jars with a lid that can seal.

Use daily.
Morning and night.
Or as needed.

You can make this for yourself or as a gift for someone. The choice is yours. But be sure. They will come back to you for more. As you will also discover how great this hand and body cream is. 

If you have any questions, comments or suggestions. Feel free to comment below or contact us. We love to hear from our readers. Please share so others can benefit from it.

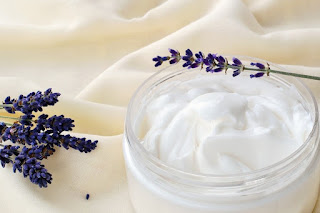
This homemade facial cream will be the best product you ever use.

As mentioned in the previous article. I will be discussing a home made facial cream that may just have you wondering why you ever considered other more expensive products. 

This was shared to me as a hush hush secret. But when I discovered how effective it is. I had to ask if I can share it with everyone. So thanks to the kindness of the lady I am able to share this home made cream with everyone. Why am I so excited to share this wonderful cream with everybody? Consider this. A lady 70 years old. With wrinkle free, great looking skin. Smiling as she told me this. And the best thing about this cream. It can become your favorite body cream too. Even the ideal hand cream.


Now you may wonder what is the catch? There is no catch. 

It is a simple and easy home made cream that works for a face cream, a body cream and even hand cream.


You will however need a few items. But the best thing is.You can make this as a gift for others and not spill the beans about what is in it. More important you can make this for yourself. Over and over again. Believe me. You will.

The ingredients. 
350 ml Johnson baby aqueous cream
1 spoonful olive oil
1 spoonful tissue oil
1 spoonful glycerin

Some add a spoonful of sweet almond oil and a spoonful of coconut oil too.

Method.
Mix everything in a jar with a lid. 
Apply on freshly cleansed face.
Use daily.
Morning and night.

Those who use it. Will tell you that not even the most expensive creams can compete with this facial cream. The best thing about this cream? You will make it again and again. 

Personally I have oily skin.This home made cream does not give me any skin problems from the products added. So that is a great plus to consider. 

I hope you found this article useful. Please share so others can benefit from this article too. If you have any questions. comments or suggestions feel free to comment below or contact us. We love to hear from our readers.

This DIY anti-aging collagen face mask fights aging and wrinkles. Also good for blackheads.

Today I want to talk to the ladies about a facial mask that is anti-aging. But also highly effective against the fight against wrinkles. It fills wrinkles. Tried tested and approved. Even for those struggling with blackheads. You will be happy that you tried this face mask. 


Now if you combine that with a home made face and body cream. You will wonder why you ever considered buying store bought face cream. And as the cream can be used for a body lotion you will be happy and amazed. But that article isn't what we will check out now.

Lets talk about collagen for a moment. Even famous brands tells you collagen is vital for your skin. So don't be surprised that this is a collagen facial mask. Combine that with a few other things and you will wonder how you ever got along without it. Gelatin is a source that is filled with collagen. So it will be one of the ingredients. 


Arthritis
Incidentally. Many people who deal with joint pains and arthritis will tell you they add a spoonful of gelatin to their morning coffee. Not sure how it tastes but they say it gives effective relief. But too much can be hazardous for health. So in limited quantities it is excellent for arthritis. So consider the gelatin desserts as part of your lifestyle. There is such a wonderful variety of ways to use it. So do enjoy. Even diabetic friendly versions. And as it is rich in collagen. This way you feed your skin from within too. 

This home made face mask contains 
2 tablespoons gelatin. 
Just enough hot water to dissolve the gelatin.
1 teaspoon honey. I prefer using raw honey.
Teaspoon olive oil.
And last but not least 1 teaspoon lemon juice.

Mixing
Start by adding the gelatin in your container. 
Add the hot water. Small amount!! 
Stir to dissolve the gelatin. 
Add all other ingredients. The honey, olive oil and the lemon juice. 
Now mix everything together. 

Please note
Please do not apply if it the mixture is hot. The idea is the collagen mixture should be melted for application. Luke warm will be fine and more important. SAFE. 
As you can do this every day or two three times a week. 
Choice is yours. 

Method
Place bottle in hot water if the gelatin mixture needs to melt again. Apply on freshly cleansed face. Leave to dry completely. Peel off the face mask once it is dry. Or rinse it off. The choice is yours. But for blackheads the best option is peeling it off. Apply your favorite moisturizer. 

Or you can consider this wonderful moisturizer that I mentioned earlier. The moisturizer will be mentioned in the next article. Everyone who use it. Swears by the effectiveness of it. Admitting that is the best secret they ever had. But want to share it so everyone can benefit from this. So please keep checking as it will be posted too. But that is the next article. 

I hope you found this article helpful. Please share so others can benefit from it too. If you have any questions, comments or suggestions. Feel free to comment below or contact us.

Thursday, 5 September 2019

Quick efficient ways to relieve headaches.

Imagine for a moment. It is the middle of the night. You have a numbing painful headache that feels like it is getting worse with every passing second. You look in your medicine cabinet. And oh no. Nothing. You feel like that headache is still getting worse. And you know you can not cope. Thinking that in the morning you can get something for that headache. Nope. Not an option. You need relief now. Have you ever experienced this? Yes I have. So with that in mind. I share effective ways to help relieve that headache. 


Acupressure points.
All these images shows you pressure points that can help to relieve your headache. Now do not be surprised that it works. Remember that your whole body is connected as one whole organ. Certain places, or as some would call it. Pressure points in your body helps to alleviate headache. What this means for you is. You have to hold any of these pressure points firmly (shown in image). But not hard that it is painful on the specific pressure points. Just firm enough to help relieve your headache. Massaging gently. It can be from one minute to five minutes. Depending on the severity of the headache.

Water.
If you are dehydrated. Your body tells you that something is wrong by causing headache. So you need to make sure that you are hydrated. So drink water. Or if you do not like water. Eat foods that is rich in water. 

Sleep.
How much time is needed for a proper night's rest? If you do not get enough sleep. This can also be a reason for suffering from headache. But that does not mean you should sleep more than 9 hours. As it is also known to cause headaches if you sleep for too long. Remember 7 to 9 hours is enough.

Cold compress
Using a cold compress can help with a headache because it helps to decrease inflammation. It also slows nerve conduction and tighten blood vessels. What you need to do. Take a bag that is waterproof. Fill it with ice. Wrap towel around it. Place it on either neck temples or head. Depending on where the pain is. Effective pain relief. This also works well for sprains and pains on the knee leg or other places.    

Coffee
Coffee lovers will love this home remedy. Because coffee can also help to relieve headaches. Why? you may wonder. Coffee tightens blood vessels too. Making it highly effective to be considered a home remedy for headache. And you never knew this would be a favorite. With or without headaches. But at the same time. Too much coffee can also cause headaches. So it is important to be balanced with your coffee intake. 

Stay active.
By staying active you can reduce headaches. At the same time you will get headache relief just by staying active. Scientific studies showed that people who made use of indoor cycling 3 times a week was more relaxed and at the same time had less headaches than their counterparts who was inactive. If you are not  a very active person. Your risk for headaches increase significantly. It can be as simple as walking more. Increase the amount of steps you take daily. It does not have to be specific forms of activity. 

Hot water bottle
If you suffer from a tension headache. This is known to cause stiff shoulders. Increasing pain from shoulders to neck to headache in its full forms.And cause extremely painful headaches.You can use a warm water bottle filled with warm water. Place it on your shoulders to neck to help relieve this type of headache.   

I hope all these highly effective home remedies helps with headache relief. Please share so others can benefit from this post too. Creating a headache free environment for all. 
If you have any questions comments or suggestions. Feel free to comment below or contact us. 

Wednesday, 17 July 2019

Rice water. Simple yet highly effective home remedy for healthy fast growing hair.

If you want to grow your hair faster. Or you have problems with hair that need extra nourishment. Or worse you deal with hair loss and hair falling out. Consider this safe home remedy. The result will be hair that looks beautiful and full of shine. Once you start you will share this home remedy with others. But most. You will add it to your beauty routine. Try this and see for yourself. All you need is two ingredients. And about 24 hours. I am sharing two methods.


  • Method 1

Take a bottle. Add 2 table spoons rice. Fill bottle with water. Leave the water with the rice added for at least 24 hours. You can leave the rice water for up to 48 hours. Now rinse your hair with the rice water mixture. Leave it on your hair for 20 minutes.


2 Table spoons rice
Water (preferably lukewarm)

  • Method 2

Or there is another way. The water that you usually drain when cooking rice. Just pour that water into a container. Leave it to cool. Rinse your hair with the mixture. Leave the rice water on your hair for 20 minutes. Now rinse off.

The nutrients will leave your hair soft yet stronger and even help it grow faster. You can do this daily or if you prefer once every two days. Off course the more you do it. The more your hair will improve. So it can be done once daily. Every other day or once a week. it is your personal choice.

Rice water is considered very important in the DIY beauty industry. It can even be used for keeping your skin healthy and younger looking. But that will be discussed next time. For now. 

I hope you will feel as surprised with the results as everyone who tried it. Off course now they add it to their beauty routine. And it shows. 

If you have any questions, comments or suggestions. Feel free to contact us. Or comment below.
Please share so others can benefit from this article too. 

Tuesday, 19 March 2019

Lemon and Vaseline for cracked heels. Works fast

 If you are one of the millions suffering with dry cracked and even painful heels. This safe natural home remedy is just for you. It is fast and highly effective. In no time will your feet as attractive as you want. And your dry feet will be look amazing. 


First take note

It is best to do this each night before going to bed. As always I remind people that diabetics can not leave feet in water for long periods of time. But I trust most know that by now.

Ingredients

5 drops Lemon juice.
One teaspoon Vaseline 
Wool socks
And last need warm water (for soaking your feet)

Method

First soak your feet in warm water for 15 to 20 minutes. Remove feet from water and dry thoroughly. Now for the mixing of the mixture. Mix the Vaseline and lemon juice. Rub onto affected ares of skin. Where ever it is dry and/or cracked. Always put on wool socks afterwards. (One of the hidden secrets of this home remedy) Leave it overnight on feet. Next morning wash feet as always. Repeat this every night before bed. I hope you find this home remedy helpful. 

There are so many effective ways to healthy cracked skin. If you feel another home remedy may be more suitable. Feel free to check here.
This one is handed down generations within my own family. 

I am sure you will look at your feet wondering how you battled with cracked dry and sometimes even painful feet. 

Please share so others can benefit from this article too.
If you have any questions, comments or suggestions. Feel free to comment below or contact us. Always love to hear from our readers.


Monday, 11 March 2019

Try this home remedy for aching muscles and joints. Also effective pain relief for arthritis.

If you have aches and pains. Or even suffer from arthritis. I am happy to share this home remedy with you. Once you try this. You will make sure you always have enough of it. It really works.  Tested tried and approved. I confess I myself was surprised at the effectiveness of this home remedy. So try and see for yourself why.


Items needed to make this effective home treatment

2 bottles eucalyptus oil
2 bottles camphor oil
100 ml olive oil

Method

Mix everything together in a dark colored bottle. And leave the mixture for 3 to 4 days.
After 3 or 4 days. You can start using this mixture as needed.  As with most ointments. Rub till you get a warm sensation. 

So what does it work for?
Aching muscles, joints, back pain, shoulders, neck,  feet, legs, knees, and arthritis. 

So as you can see it works for a range of aches and pains. Try and see for yourself. Once you try this you will never consider another remedy as this one really works. So, from me to you. Please do not struggle with pain wondering what works. Once you tried it, you will want to make sure you always have enough in stock. Or even some to spare for that friend or family member that needs this home remedy.

If you have any questions, comments or suggestions feel free to contact us. Or comment below. As always we love to hear from our readers.
Please share so others that is suffering from aches and pains can benefit from this great home remedy too

Thursday, 7 March 2019

Get rid of varicose veins in 10 ten day by using this home remedy.

 This article comes from a suggestion from a reader and lots of research. So thanks to the reader for giving this wonderful home remedy.

I recently was given a tip on a very unique and fast way to get rid of varicose veins. Yes ten days will make a major difference. Considering that varicose veins is caused by poor circulation and faulty valves. This home remedy may explain itself. As Epsom salts relaxes the body as well as the mind. It also improves circulation. It can remove varicose veins in ten days. 


After receiving feedback from a reader I did some research and voila. Yep this seems to work fast and efficiently. As I know many of the readers complained about how they feel about their legs. I think because this one works fast. It is a must for sharing. It makes a significant change with the appearance of varicose veins. Try and see for yourself. 


Method 1

Add two cups of Epsom salt to bath water. Do this twice a week. It will reduce the appearance of varicose veins. Also as an added bonus it relaxes body and mind. Do this twice a week. And you will notice an improvement in appearance of varicose veins. Also place your feet higher and lifted after bath. This helps to improve circulation also

Method 2

Add Epsom salt to bath water. Repeat this every day for ten days.  After your bath,  put your feet higher and lifted. Stay like this for a while and within ten days varicose veins will be gone.
This one works fast.

Please note. 

As great as this home remedy is. It is not recommended for people that suffer from high blood pressure. Or those who suffer with severe varicose veins.   

I hope this fast and effective home remedy is just what is needed to remove varicose veins. Please share so others can benefit from this advice too. If you have any questions, comments and suggestions feel free to comment below or contact us.

Please like and share

Subscribe here

Recommend us on Google!